Basic Fishing Techniques Every Beginner Should Know
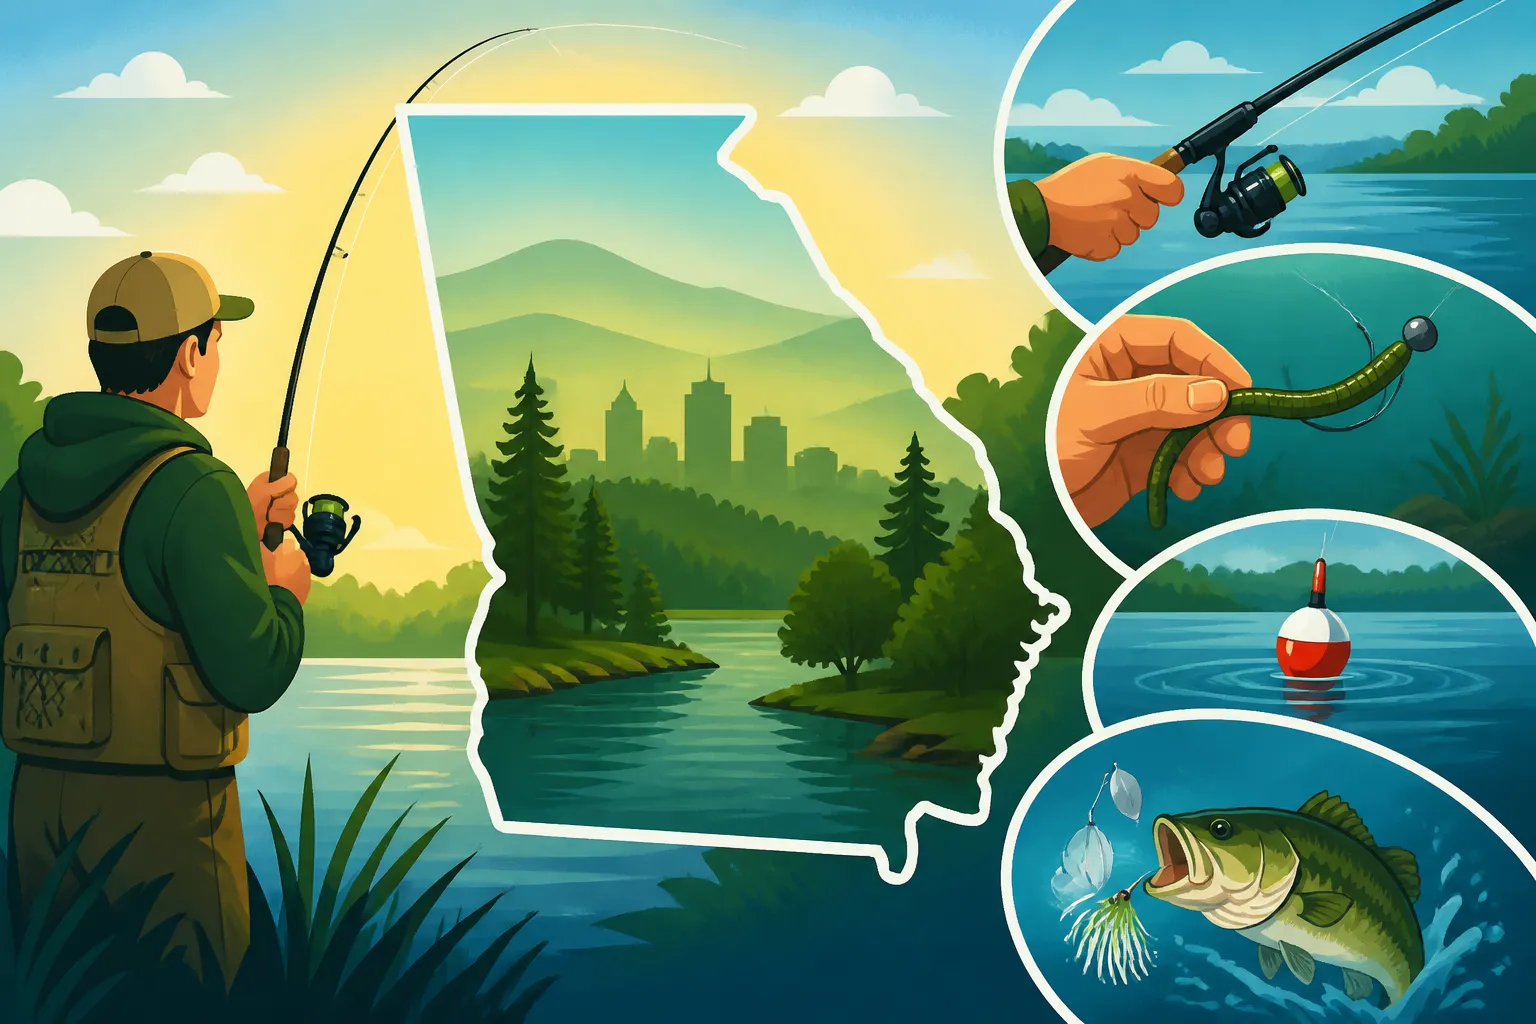
Stepping into the world of fishing can feel a bit overwhelming, can't it? You see seasoned anglers effortlessly casting, hear jargon like "terminal tackle" and "reading the water," and suddenly, what was supposed to be a relaxing hobby feels like a complicated science project. If you've ever felt that frustration, you're not alone. This comprehensive guide is designed to cut through the confusion, offering clear, step-by-step basic fishing techniques every beginner needs to know to confidently cast a line and, hopefully, reel in their first catch in Georgia's beautiful waters.
Getting Started: The Absolute Essentials for Your First Trip
Before you even think about dropping a line in the water, you need to understand the fundamental tools of the trade. Don't worry, we're not talking about a tackle shop full of fancy gadgets right off the bat. We're going to break down the absolute basics, the gear that forms the foundation of every successful fishing trip, so you can walk into a store or browse online with confidence.
Understanding Your Basic Gear: Rod, Reel, Line, and Lures
Your fishing rod, reel, and line are like the holy trinity of fishing. They work together to get your bait out, help you feel a bite, and ultimately, bring that fish to hand.
Starting with the fishing rod, for beginners in Georgia, a medium-light or medium action spinning rod is often the best choice. These rods are forgiving, versatile, and can handle a wide range of fish sizes from panfish to smaller bass. They're typically between 6 to 7 feet long, offering a good balance of casting distance and control. The "action" refers to where the rod bends. A medium action rod will bend through the top half, offering enough flexibility for casting lighter baits while still providing backbone to fight a fish.
Next, you've got your fishing reel. For a spinning rod, you'll pair it with a spinning reel. These reels are incredibly user-friendly, making them perfect for those just starting out. The bail arm opens and closes to allow line to peel off for casting and then wraps it back onto the spool as you retrieve. Look for a reel in the 2000-3000 series size, which balances well with the recommended rod length and action. You can find excellent beginner-friendly rod and reel combos on platforms like Amazon, making the initial gear selection much simpler.
Finally, there's your fishing line. This is the direct connection between you and the fish! For most beginner situations in Georgia, a monofilament line in 6-10 pound test is ideal. Monofilament is affordable, easy to tie knots with, and has a bit of stretch, which can be forgiving when a fish makes a sudden run. As you gain more experience, you might explore fluorocarbon or braided lines, but for now, mono is your best friend.
Essential Terminal Tackle: Hooks, Sinkers, Floats, and Swivels
Once you have your rod, reel, and line sorted, it's time to talk about "terminal tackle." This intimidating-sounding term just refers to all the bits and pieces at the "terminal" or business end of your fishing line. These small but mighty components are crucial for presenting your bait effectively and securing your catch.
Let's start with hooks. The size and type of hook you use depend entirely on the fish you're targeting and the bait you're using. For panfish like bluegill or crappie, smaller Aberdeen or baitholder hooks (sizes #8 to #4) are perfect, especially when paired with a small piece of worm or a cricket. For larger fish like bass or catfish, you'll move up to larger hooks, perhaps an offset worm hook (1/0 to 3/0) for soft plastic lures or a circle hook (1/0 to 5/0) for live or cut bait. Always make sure your hook is sharp; a dull hook is the quickest way to miss a bite!
Sinkers, also known as weights, are used to get your bait down to where the fish are. They come in many shapes and sizes. Split shot sinkers are small, round weights that you crimp directly onto your line, great for adding just a little extra weight to a bobber rig. Bullet weights are tapered and often used for Texas rigging soft plastics, allowing your bait to slide through cover without snagging. Egg sinkers or bank sinkers are heavier and used for bottom fishing rigs, especially in currents. Having a small assortment of these in various sizes will cover most beginner fishing scenarios.
Floats, or bobbers, are probably the most iconic piece of terminal tackle for many beginners. They serve two main purposes: to suspend your bait at a specific depth and to signal a bite. When a fish takes your bait, the bobber will dip, dance, or go completely under, letting you know it's time to set the hook. Traditional clip-on bobbers are great for shallow water, while slip bobbers, which slide freely on your line, are fantastic for presenting bait at deeper, more precise depths. Learning to use a simple bobber rig is one of the easiest ways to get started. You can read more about How to Rig a Bobber for Bream in a dedicated guide.
Finally, swivels are often overlooked but incredibly useful. They prevent your line from twisting, which can be a real headache, especially if you're using spinning lures or fishing in current. A barrel swivel or snap swivel can be tied into your line to connect your main line to your leader (a short section of line tied to your hook), or to attach lures that tend to spin. They add an extra layer of protection against line twists and make changing lures or leaders quicker and easier.
The Permit Primer: Licenses and Regulations
Alright, so you’ve got your gear together, but before you head out to your favorite fishing hole, there’s one non-negotiable step: understanding and complying with Georgia’s fishing license requirements and regulations. This isn't just about avoiding a fine; it's about contributing to the conservation efforts that keep Georgia's fisheries healthy and abundant for everyone.
Every angler aged 16 and older needs a valid Georgia fishing license to fish in the state's public waters. There are exceptions for certain private ponds, but generally, if you're on a lake, river, or coastal water open to the public, you need one. The Georgia Department of Natural Resources (DNR) makes it pretty straightforward to get one, whether you're a resident or an out-of-state visitor. You can purchase them online, over the phone, or at authorized license agents like sporting goods stores and bait shops throughout the state. I highly recommend checking out our comprehensive Georgia Fishing License Guide for all the details on types, costs, and where to buy.
Beyond the basic license, there might be additional endorsements required depending on what you plan to fish for. For instance, if you're chasing trout in Georgia's beautiful mountain streams, you'll need a Mountain Trout License in addition to your basic fishing license. Saltwater fishing along Georgia's coast requires a free Saltwater Information Permit, even though you might also have a regular fishing license. It's always best to check the current regulations published by the Georgia DNR each year, as they can change.
And what about the little ones? This is a common question. Generally, Do Kids Need a Fishing License in Georgia? is answered by the age requirement: those under 16 are exempt. This is fantastic news for families looking to introduce their children to the joy of fishing without the added cost and paperwork. However, it's still crucial to teach them about ethical fishing practices, catch limits, and responsible stewardship of our natural resources from an early age.
Understanding size limits and daily creel limits (the number of fish you can keep) for different species is also critical. These rules are in place to ensure fish populations remain sustainable. For example, there are specific size limits for bass on certain lakes like Lake Lanier, and trout streams often have strict daily creel limits. Always identify your catch and know the rules for that species in that particular body of water. Ignorance of the law is no excuse, and wardens take these regulations seriously for good reason.
Mastering the Cast: Getting Your Bait Where the Fish Are
Learning to cast effectively is one of the most rewarding and fundamental skills in fishing. It’s what gets your bait from your rod tip out to that promising spot where you suspect the fish are lurking. For beginners, the spinning reel is your best friend when it comes to casting, offering ease of use and versatility. Let's break down the two most common and useful casts you'll want to master.
The Overhead Cast: Your Go-To Technique
The overhead cast is the bread and butter of casting techniques. It’s powerful, accurate, and generally the first cast every angler learns. Once you get the rhythm down, you'll be able to send your bait flying with surprising ease.
Here’s a step-by-step breakdown for a right-handed angler using a spinning reel:
- Grip the Rod Properly: Hold the rod with your dominant hand above the reel. Your index finger should comfortably rest on the rod blank, just in front of the reel stem.
- Reel in to the Right Distance: Reel your lure or bait in so that it's hanging about 6 to 12 inches from the tip of your rod. Too long and it’s clumsy; too short and you won't get enough momentum.
- Open the Bail: With your non-dominant hand, open the bail on your spinning reel. Immediately use your dominant hand's index finger (the one resting on the rod) to secure the line against the rod handle. This is crucial; it prevents the line from prematurely flying off the spool.
- Target and Look Back: Turn your body slightly towards your target. Look over your shoulder and pick a spot in the direction you want your lure to land. This helps with accuracy.
- The Smooth Backward Motion: Bring the rod up and back in a smooth, arcing motion. Your arm should bend at the elbow, and the rod tip should travel to about the 10 or 11 o'clock position (just slightly past vertical over your shoulder). Don’t snap it back hard; let the rod’s flex load up with the weight of the lure.
- The Forward Power Stroke: Without pausing at the back, smoothly bring the rod forward, accelerating it towards your target. As the rod passes over your head and reaches roughly the 2 o'clock position (about 45 degrees in front of you), release the line with your index finger.
- Follow Through: Your rod tip should follow the trajectory of your lure, pointing directly at where you want it to land. This follow-through helps with accuracy and distance.
- Close the Bail and Prepare: As your lure is about to hit the water, quickly close the bail with your non-dominant hand or by cranking the reel handle once. This prevents a bird's nest (tangled line) and prepares you to immediately start retrieving if necessary.
Practice this motion without a hook first, perhaps in your backyard, using a small weight. Focus on the smooth, fluid motion and the timing of your release. It feels awkward at first, but with repetition, it will become second nature.
The Sidearm Cast: For Tricky Spots and Low Obstacles
While the overhead cast is your primary tool, there will be times when it's just not practical or even possible. Think about fishing under low-hanging tree branches, along a brushy bank, or in crowded areas where an overhead cast could be dangerous. That's where the sidearm cast comes in handy. It’s a lower, more discreet cast that keeps your lure close to the ground (or water) during its trajectory.
Here’s how you execute a sidearm cast:
- Initial Setup: Grip your rod and reel in the same way you would for an overhead cast, with your lure hanging 6-12 inches from the tip. Open the bail and secure the line with your index finger.
- Body Position: Turn your body almost parallel to the water's edge, facing your target.
- The Horizontal Arc: Instead of bringing the rod over your shoulder, you'll bring it back in a horizontal arc, roughly parallel to the ground. Your arm will extend out to your side, and the rod tip will come back to about the 9 o'clock position. Again, let the rod flex and load up.
- The Forward Swing and Release: In a smooth, sweeping motion, bring the rod forward. As it approaches the 3 o'clock position (or the point where the rod is pointing directly at your target), release the line with your index finger.
- Controlled Follow Through: Your rod tip will follow the lure’s trajectory, staying low and guiding it towards your target.
- Close Bail and Engage: Close the bail and get ready for retrieve as the lure hits the water.
The sidearm cast requires a bit more finesse to get good distance and accuracy, but it’s invaluable for presenting your bait in tight spots or when you need to skip a lure under docks or overhangs. It's also less fatiguing for prolonged casting sessions compared to repeatedly making strong overhead casts.
Practice Makes Perfect: Drills and Tips for Accuracy
Let’s be honest, no one becomes a master caster overnight. It takes practice, patience, and a willingness to learn from your misses. Luckily, you don’t even need to be on the water to hone your skills.
Backyard Drills: Set up some targets in your yard. A hula hoop, a five-gallon bucket, or even an old tire works great. Start close, say 10-15 feet, and focus on consistently hitting your target. As your accuracy improves, gradually move the targets further away. Use a casting plug or a small, hookless weight for safety. This repetition builds muscle memory and helps you get a feel for the rod's flex and the timing of your line release.
Common Casting Mistakes and How to Fix Them:
- "The Bird's Nest" or "Backlash": This happens when the line prematurely peels off the spool in a tangled mess. For spinning reels, it's often due to not closing the bail quickly enough or releasing the line too early/late. Practice closing the bail just before the lure hits the water.
- Lack of Distance: Many beginners try to overpower the cast, muscling the rod. Instead, focus on a smooth, controlled motion that allows the rod to do the work. The "load" or bend in the rod is what propels your lure.
- Poor Accuracy: Often, this comes down to not looking at your target or not following through with your rod tip. Always pick a specific spot you want your lure to land, not just a general direction. Keep your eye on that spot throughout the cast.
- "Whippy" Motion: Avoid jerky or snapping motions. Think of your cast as a graceful pendulum swing rather than a violent whip. A smooth, accelerating arc is far more effective.
Don’t get discouraged if your first few dozen casts don't go exactly where you want them. Every angler, from beginner to pro, has had their share of terrible casts. The key is to keep practicing, observe what works and what doesn't, and adjust your technique. Soon, you'll be dropping your bait right where you want it, unlocking a whole new level of enjoyment in your fishing adventures.
Fundamental Rigging: Setting Up Your Line for Success
Once you can cast, the next crucial step is learning how to set up your line with hooks, weights, and bait – what we call "rigging." The right rig ensures your bait is presented naturally and effectively to the fish. For beginners, simplicity is key. Let's focus on a couple of tried-and-true rigs that will put you on the path to catching fish in Georgia's diverse waters.
The Simple Bobber Rig: A Classic for Panfish
The bobber rig is arguably the most iconic and user-friendly fishing setup, especially perfect for introducing kids or new anglers to the sport. It's incredibly effective for targeting panfish like bluegill, crappie, and even smaller bass that often lurk in shallower waters. The beauty of a bobber rig lies in its visual bite detection and straightforward setup.
Here’s how to assemble a simple fixed bobber rig:
- Tie on Your Hook: Start by tying a small baitholder hook (size #8 to #4) directly to the end of your main fishing line using a reliable knot like an Improved Clinch Knot. If you're not confident in your knot-tying yet, there are many excellent visual guides online.
- Attach the Bobber: Slide a small, brightly colored clip-on bobber onto your line. The bobber usually has a spring-loaded clip on the bottom and a small cap on the top that twists. Push in the bottom clip, thread your line through, and release. Do the same for the top.
- Add a Split Shot Sinker: About 6-12 inches above your hook, crimp one or two small split shot sinkers onto your line. These tiny weights are essential because they help your bait sink and keep it suspended vertically beneath the bobber, making it look more natural. They also provide just enough resistance for the bobber to dip when a fish bites.
- Determine Your Depth: The distance between your bobber and your hook determines how deep your bait will sit in the water. For panfish, which often hang out near cover in shallower areas, start with a depth of 2-4 feet. You can easily adjust this by sliding the bobber up or down your line.
- Bait Up! Now for the fun part! Thread a live earthworm, red wiggler, or a cricket onto your hook. For bluegill and bream, these natural baits are irresistible. If you're targeting crappie, a small live minnow hooked lightly through the lip or back is often deadly. This setup is a classic for Bream and Bluegill Fishing for Beginners and a fantastic way to ensure success on your first outings.
When fishing with a bobber, cast it near submerged structure, lily pads, or dock pilings. Watch the bobber closely. Any twitching, bobbing, or sudden disappearance indicates a bite. Give the fish a moment to take the bait, then gently but firmly lift the rod tip to set the hook.
The Bottom Rig: Targeting Catfish and Deeper Dwellers
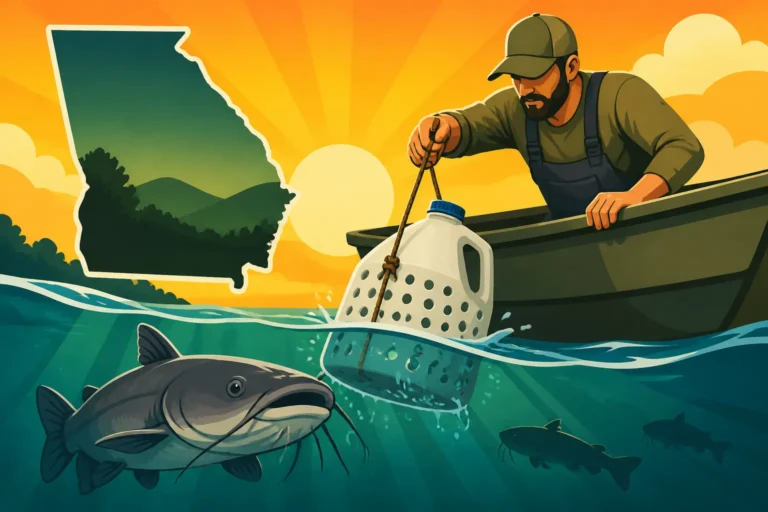
When you want to get your bait down deep, especially for species like catfish, carp, or even some bass that prefer to feed on the bottom, a simple bottom rig is the way to go. This setup keeps your bait anchored on the lakebed or river bottom, right where those ground-feeding fish are looking for a meal.
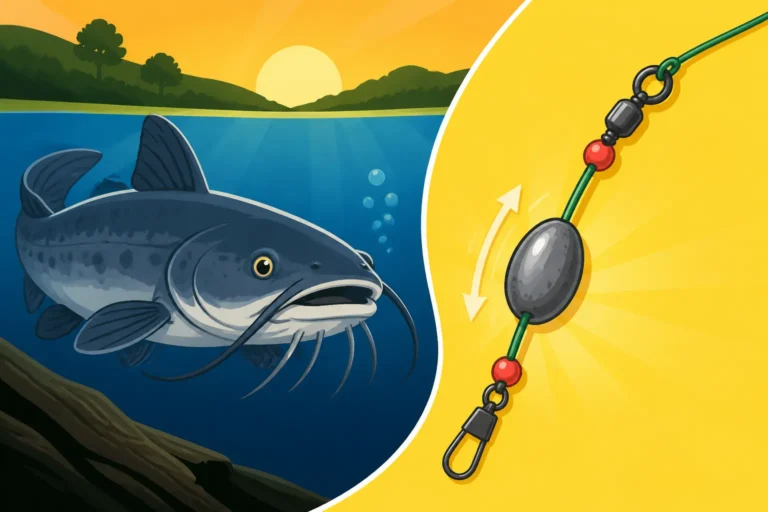
A popular and effective bottom rig for beginners is a modified Carolina Rig:
- Thread the Sinker: Start by sliding an egg sinker (1/4 oz to 1 oz, depending on current and depth) onto your main line. Unlike a fixed bobber, this sinker will slide freely on your line.
- Add a Bead: After the sinker, slide a small plastic or glass bead onto your line. This bead protects your knot from the sinker constantly banging against it.
- Tie on a Swivel: Tie a barrel swivel to the end of your main line, right after the bead, using an Improved Clinch Knot or a Palomar knot. This swivel acts as a stopper for the sinker and bead, preventing them from sliding down to your hook. It also helps prevent line twist.
- Create a Leader: Now, cut a separate piece of monofilament or fluorocarbon line, about 12-24 inches long. This is your leader.
- Tie Hook to Leader: Tie your chosen hook to one end of the leader. For catfish, a strong circle hook (1/0 to 5/0) is excellent, as it often hooks the fish in the corner of the mouth, making for easier release and less harm to the fish.
- Connect Leader to Swivel: Tie the other end of your leader to the open eye of the barrel swivel.
- Bait Up! For catfish, fresh cut bait (like pieces of shad, bluegill, or chicken liver) are incredibly effective. You can also use large earthworms, shrimp, or even prepared stink baits. This rig is fantastic for Catfish Bottom Fishing Basics and an easy way to get your bait where the big ones feed.
Once cast, let the sinker settle to the bottom. Keep a slight tension on your line so you can feel bites. Catfish often give a slow, deliberate pull or a series of taps. With a circle hook, you don't need to set the hook aggressively; just slowly reel in, and the hook will typically set itself as the fish moves away. For a deeper dive into techniques, refer to our guide on How to Bottom Fish for Catfish.
Basic Lure Presentation: Retrieving and Working Artificial Baits
While live bait is incredibly effective, learning to use artificial lures opens up a whole new world of fishing possibilities. Lures allow you to cover more water, imitate various prey, and actively engage with the fishing process. For beginners, starting with simple lures that are easy to "work" is crucial.
Spinners and Inline Spinners: These are some of the easiest lures to start with. They consist of a blade that spins around a central wire shaft, creating flash and vibration in the water that mimics fleeing baitfish. Lures like the classic Mepps Aglia or a Rooster Tail are perfect examples. To retrieve them, simply cast and reel at a steady pace. The blade will spin on its own. Experiment with different retrieve speeds – sometimes a fast retrieve triggers a reaction strike, while a slower one might entice a more hesitant fish. They're excellent for trout, panfish, and even smaller bass.
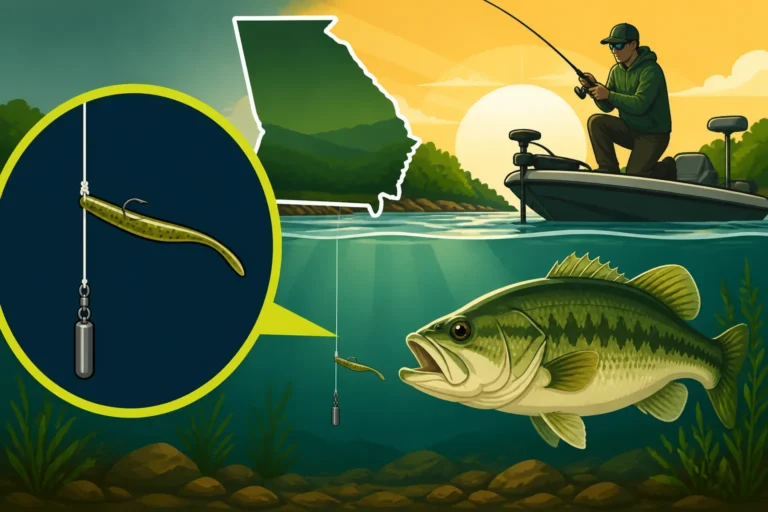
Soft Plastics on a Jig Head: Soft plastic baits come in countless shapes and sizes, mimicking worms, minnows, crawfish, and more. For beginners, a simple grub or small worm threaded onto a lightweight jig head (1/16 oz to 1/8 oz) is a fantastic starting point. The jig head provides the weight to cast and sink the plastic. You can retrieve these by simply casting them out and slowly reeling them in with occasional pauses, or a gentle twitch of the rod tip to make the plastic "swim." This subtle action can be incredibly effective for crappie, bass, and other species.
Understanding Retrieve Speed and Action: The key to lure fishing is "presentation." You want to make your lure look as natural and enticing as possible.
- Steady Retrieve: Simple reeling at a consistent speed. Great for spinners and some crankbaits.
- Stop-and-Go (or Pause-and-Go): Reel for a few seconds, then pause, letting the lure sink or suspend, then resume reeling. This erratic action often triggers strikes as fish think the bait is injured.
- Twitching/Jerking: Using your rod tip to impart quick, short movements to the lure, making it dart or "hop." This is particularly effective for soft plastics and some jerkbaits.
Choosing the right lure can also depend heavily on the time of year and water conditions. For example, bright, flashy lures might work well on sunny days, while more subtle colors are better in clear water. Understanding these nuances helps you adapt and catch more fish. Our guide on Choosing Lures by Season offers more in-depth advice on this topic. Don't be afraid to experiment with different retrieve styles until you find what the fish are responding to on a given day. You can find a huge variety of these lures and jig heads on Amazon, which often has beginner assortments that are a great starting point.
| Rig Type | Target Fish (Georgia) | Common Bait/Lure | Key Components | Advantages for Beginners |
|---|---|---|---|---|
| Bobber Rig | Bluegill, Crappie, Small Bass | Worms, Crickets, Minnows | Clip-on bobber, small hook, split shot | Easy to detect bites, simple setup |
| Bottom Rig | Catfish, Carp, Larger Bass | Cut bait, Live worms, Dough bait | Egg sinker, bead, swivel, circle hook | Gets bait to deep feeders, less snagging |
| Jig Head Rig | Crappie, Bass, Perch | Soft plastic grubs/worms | Jig head (hook + weight), soft plastic | Versatile, active fishing, covers water |
| Inline Spinner | Trout, Bass, Panfish | N/A (self-contained lure) | Inline spinner lure | Simple cast & retrieve, good vibration |
Understanding Fish Behavior: Reading the Water and Seasonal Changes
Fishing isn't just about casting a line; it's about understanding the environment and the creatures that live within it. Becoming a successful angler means learning to "read the water" and anticipate how fish behave in response to different conditions and the changing seasons. This knowledge will dramatically increase your chances of finding and catching fish.
The Impact of Weather and Water Conditions
Fish, like us, are creatures of comfort, but their comfort zone is dictated by factors like water temperature, clarity, and even barometric pressure. Ignoring these can lead to a frustrating day on the water.
Water Temperature: This is perhaps the most critical factor. Every fish species has an optimal temperature range where it's most active, feeding, and spawning. For example, largemouth bass are typically most active when water temperatures are between 65-75°F. If the water is too cold, their metabolism slows down, and they become sluggish, seeking deeper, more stable temperatures. If it's too hot, they'll also seek cooler, deeper water or shade. Learning How Water Temperature Affects Fish Behavior is key to understanding where to find fish throughout the year. Cold fronts, for instance, can rapidly cool surface water, sending fish deeper.
Water Clarity: How clear or murky the water is significantly impacts how fish feed. In clear water, fish rely heavily on their eyesight, so natural-colored baits and a stealthy approach are often best. In murky or stained water, fish depend more on their lateral line (to detect vibrations) and scent. Here, brighter, louder lures or strong-smelling baits can be more effective. Heavy rains can muddy up rivers and lakes, affecting clarity and pushing fish to areas where the water is cleaner or to shallower areas to escape the current.
Weather Conditions: Don't underestimate the power of the sky above. Overcast days with a light drizzle can often be fantastic for fishing, especially for bass, as the diffused light encourages them to move out of cover and feed. Bright, sunny days, particularly in summer, often push fish deeper or into dense shade. Wind can be both a blessing and a curse. A light chop on the water can break up the surface, making fish less wary and often pushing baitfish closer to shore. However, strong winds make casting difficult and can create dangerous boating conditions. And speaking of dawn, understanding Why Fish Bite Better at Dawn is crucial; the low light and cooler temperatures are often prime feeding times.
Finding Fish: Structure, Cover, and Depth
Fish don't just swim aimlessly; they relate to their environment. Learning to identify "structure" and "cover" is like finding their homes and hunting grounds.
Structure refers to changes in the lake or river bottom. This includes drop-offs, humps, ledges, points, creek channels, and submerged roadbeds. These underwater contours act as highways and ambush points for fish. For example, a bass might sit on a deep ledge, waiting for baitfish to swim over the shallower flat. When you're looking at a map of a lake or river, these are the lines and changes in depth you're looking for.
Cover refers to anything that provides shelter or hiding spots on the structure. This could be submerged timber, brush piles, rock piles, weed beds, lily pads, boat docks, or even bridges. Fish use cover for several reasons:
- Ambush Points: Hiding to dart out and ambush prey.
- Protection: From predators (if they're small fish) or from harsh sunlight.
- Resting Areas: Places to conserve energy away from current or open water.
When you're fishing, visually scan the shoreline for obvious cover like overhanging trees, docks, or visible weed lines. If you have a fish finder (though not strictly necessary for beginners), it can reveal submerged brush piles and depth changes. Without one, focus on visible cover and imagine how the bottom might change beneath the surface. Look for where shallow water meets deeper water, or where a change in current might create a calmer eddy. Fish love edges.
Depth: The depth at which fish hold can change by the hour. Early morning or late evening, fish might be shallow, feeding aggressively. As the sun rises, they often move deeper to escape the light and find cooler water. In winter, they'll typically be found in the deepest parts of a lake where water temperatures are more stable. Always consider the time of day and the prevailing weather conditions when deciding what depth to target.
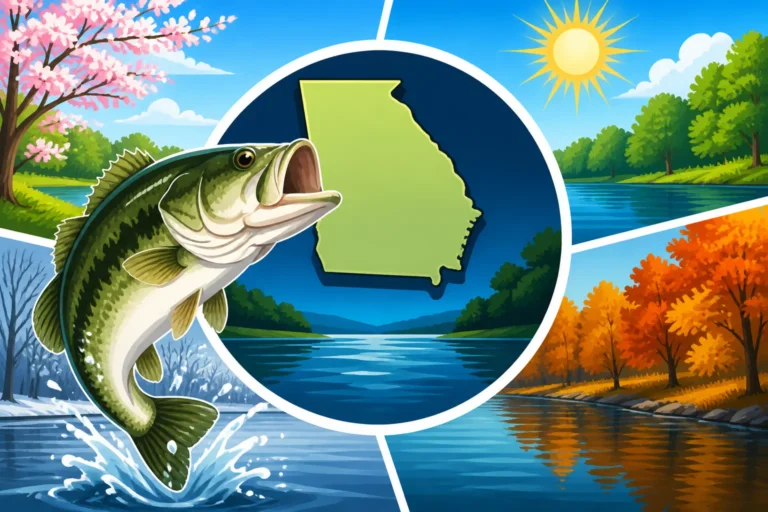
Seasonal Fishing Patterns in Georgia
Georgia's diverse climate means fishing opportunities abound year-round, but what you fish for and how you approach it will shift with the seasons. Understanding these general patterns will make you a much more effective angler.
Spring (March – May): The Spawning Frenzy
Spring is arguably the most exciting time to fish in Georgia. As water temperatures rise, fish become incredibly active, preparing for and engaging in their annual spawn.
- Bass: Largemouth bass move into shallower, warmer coves and pockets to build nests. They become very aggressive and are often visible on their beds, making them targets for sight fishing. Lures like spinnerbaits, crankbaits, and soft plastics are very effective.
- Crappie: Crappie also move shallow to spawn, congregating around submerged brush, docks, and lily pads. Small jigs and minnows are deadly.
- Trout: Many of Georgia's mountain streams see increased activity as trout stocking begins, making it a prime time for fly fishing or spin fishing with small inline spinners or PowerBait. Check the Georgia Trout Stocking Schedule Explained for precise timing.
Summer (June – August): Deep and Early/Late
Summer heat pushes many fish deeper during the day, but early mornings and late evenings can be phenomenal.
- Bass: Largemouth bass often retreat to deeper structure, creek channels, or under heavy shade. Topwater lures are fantastic at dawn and dusk, while deep-diving crankbaits or Carolina rigs work well during the day.
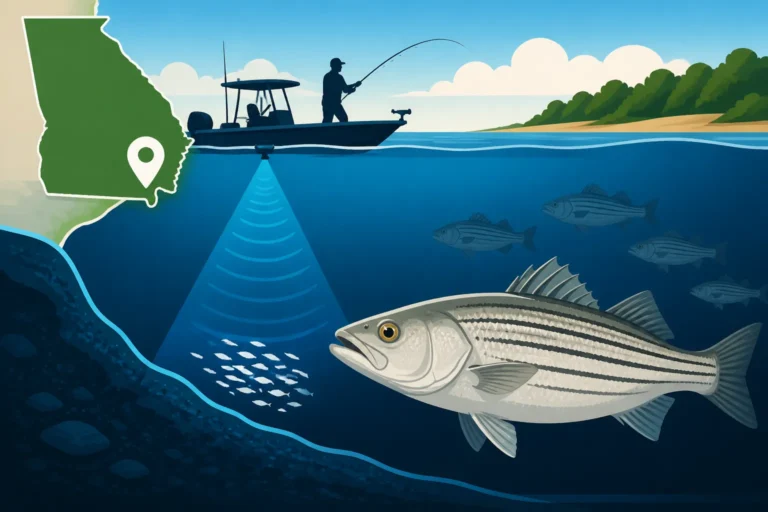
- Striped Bass/Hybrid Stripers: These powerful fish become very active in the main lake basins, often schooling and chasing baitfish. Live bait (like blueback herring) or spoons are effective in deeper water.
- Catfish: Summer nights are prime for catfish, as they feed actively on the bottom. Fresh cut bait or chicken liver fished on a bottom rig is a classic approach.
Fall (September – November): The Feeding Blitz
As temperatures cool, fish enter a pre-winter feeding frenzy, trying to fatten up. This can lead to some incredible action.
- Bass: Bass move shallower again, chasing schools of baitfish that are pushed to the surface or into creek arms. Topwater, jerkbaits, and crankbaits can be very productive.
- Trout: Fall trout stocking ramps up, and the cooler water in North Georgia's streams makes for excellent fishing. This is a great time to visit your favorite mountain streams.
- Crappie: Crappie can be found schooling around brush piles and creek channels, often at medium depths.
Winter (December – February): Slow and Deep
Winter fishing can be challenging but rewarding for those who brave the cold. Fish are typically deeper and less active, requiring slower presentations.
- Bass: Largemouth bass congregate in deep water on main lake points, creek channels, and steep drops. Jigging spoons, deep-diving crankbaits, or slow-fished jigs are effective.
- Crappie: Crappie school tightly in deep brush piles or submerged timber. Vertical jigging directly over them with small jigs or minnows can be very productive.
- Lake Sinclair: Interestingly, Lake Sinclair is known for fishing warmer than other Georgia lakes in winter, making it a popular spot when others slow down.
Our comprehensive guide, Georgia Fishing Seasons by Month, offers a month-by-month breakdown, while A Year-Round Guide to Fishing in Georgia provides an even broader perspective. By understanding these seasonal shifts, you can tailor your approach and increase your success no matter when you hit the water.
The Art of the Hookset and the Fight: Bringing Them In
So, you’ve cast your line, presented your bait perfectly, and suddenly – thump! You feel a bite. This is the moment every angler lives for. But feeling the bite is only half the battle. Knowing how to properly set the hook and then skillfully fight the fish are crucial steps to bringing your catch to hand.
Recognizing a Bite and Setting the Hook
Detecting a bite might seem straightforward, but fish can be subtle, especially when the water is cold or they’re not aggressively feeding. Learning to distinguish a true bite from a bump on structure or a snag is an important skill.
Different Types of Bites:
- The Tap: A distinct, quick tap or series of taps on your line or rod tip. Often common with panfish or bass gently mouthing a bait.
- The Pull: A sustained, steady pull on your line, feeling like the line is tightening and moving away. This is often a larger fish that has fully committed to the bait.
- The Run: Your line suddenly starts peeling off your reel rapidly. This is an unmistakable bite from an aggressive fish or a species known for strong runs, like a striped bass.
- The Weightless Feeling: Sometimes, a fish will pick up your bait and swim towards you. This results in your line going slack and feeling "weightless." This is a tricky one to detect but requires an immediate and aggressive hookset.
- Bobber Down!: If you're using a bobber rig, any significant movement – a dip, dance, or sudden disappearance beneath the surface – is your cue.
Setting the Hook: Once you've determined it's a bite, it's time for the hookset. This is a swift, firm motion designed to embed the hook securely into the fish's mouth. The technique can vary slightly depending on the type of fishing, but the core principle is the same:
- Reel Down to Take Up Slack: Immediately after feeling the bite, quickly reel in any slack line until you feel direct tension with the fish. This is critical for a solid hookset.
- Lift and Sweep: With your rod tip pointed generally at the fish, make a sharp, upward or sideways sweep of your rod. It's not a violent yank, but a strong, deliberate lift. Imagine sweeping the rod from the 9 o'clock position to the 12 o'clock or 1 o'clock position in one fluid motion.
- Maintain Pressure: As soon as you set the hook, maintain constant pressure on the line. This prevents the hook from dislodging and keeps the fish from throwing the hook.
For certain rigs, like those using circle hooks for catfish, an aggressive hookset isn't necessary. The design of a circle hook is such that it usually sets itself in the corner of the fish's mouth as the fish moves away and you begin to reel in. Just slowly tighten your line and apply steady pressure.
Playing the Fish: Rod Control and Drag Management
You've set the hook! Now the real fun begins – playing the fish. This is a delicate dance between angler and fish, using your rod and reel to tire the fish out and bring it closer.
Keep Your Rod Tip Up: This is rule number one. Your rod is designed to flex and absorb the shock of the fish's struggles. By keeping your rod tip pointed up, typically between the 9 o'clock and 11 o'clock position, you maximize the rod's ability to act as a shock absorber. This puts pressure on the fish, allows the rod to bend deeply without breaking, and keeps the line tight. If you point your rod directly at the fish, you lose this crucial shock absorption, and your line is much more likely to snap.
Manage Your Drag: Your reel's drag system is your best friend during a fight. It's a clutch mechanism that allows line to be pulled off the spool when the fish exerts more force than the drag setting.
- Setting the Drag: Before you even cast, you should set your drag. A good rule of thumb for beginners is to set it so that when you pull on the line directly from the reel, it slips smoothly but with some resistance. It should be loose enough to let a strong fish pull line, but tight enough to put pressure on the fish. You don't want it locked down completely (this will snap your line), nor do you want it so loose that the fish can swim away endlessly without tiring.
- Adjusting During the Fight: During the fight, if a fish makes a powerful run, let it take line! Don't try to stop it by tightening the drag too much, as this will likely break your line. As the fish tires, you can slightly tighten the drag (if necessary) to gain more control. If the fish surges again, be prepared to loosen it a bit.
Pump and Reel: This is the basic technique for gaining line on a fighting fish.
- Pump: Lift your rod tip up towards the sky (like you're setting the hook again, but less aggressively), pulling the fish closer.
- Reel Down: As you lower your rod tip back towards the water, quickly reel in the slack line you've gained.
Repeat this "pump and reel" motion continuously. It's much more effective than just cranking the reel handle against a strong, pulling fish, which can damage your reel or break your line. Patience is key here; don't rush the fish. Let it make its runs, letting the drag do its job, and slowly gain line back when it rests.
Landing Your Catch: Netting and Handling
The fight is nearly over, and the fish is finally close to the boat or bank. This is often where anglers get excited and make mistakes. Landing a fish safely and efficiently is the final step in the process.
Using a Landing Net: A landing net is an invaluable tool, especially for larger fish or if you plan to practice catch and release.
- Position the Net: Once the fish is tired and near the surface, submerge the net into the water, positioned to scoop the fish headfirst.
- Guide the Fish: Guide the fish over the submerged net, and then swiftly scoop it up. Do not chase the fish with the net; let the fish come to the net.
- Lift and Secure: Once the fish is in the net, lift it quickly but carefully, ensuring it doesn't flop out.
Safe Handling for Keepers and Releases:
How you handle a fish depends on whether you plan to keep it for the dinner table or release it.
- For Keeping: If you're keeping the fish, immediately dispatch it humanely and place it on ice. This maintains the quality of the meat.
- For Releasing (Catch and Release): This is where careful handling is paramount to ensure the fish's survival.
- Minimize Air Exposure: Fish cannot breathe air. Keep them in the water as much as possible. If you must remove them for a photo, do it quickly (no more than 10-15 seconds) and get them back in the water.
- Wet Hands: Always wet your hands before touching a fish. Dry hands can remove the protective slime coat, making the fish vulnerable to disease.
- Support the Fish: If you're holding a fish, especially a larger one, support its body horizontally with two hands. Avoid holding it vertically by the jaw if it's a heavier fish, as this can damage its internal organs or jaw.
- De-hooking: Use needle-nose pliers or a de-hooking tool to gently remove the hook. If the fish is deeply hooked and you can't easily remove it, it's often better to cut the line as close to the hook as possible. The hook will usually rust out over time.
- Revive the Fish: For larger or tired fish, hold them gently in the water, facing into any current, until they swim off on their own. Don't just toss them back; ensure they are strong enough to survive. This is particularly important for species like trout, and we have a detailed guide on How to Catch and Release Trout Properly.
Mastering the hookset, the fight, and careful landing techniques will not only lead to more successful catches but also ensure you're a responsible and ethical angler, respecting the fish and the fishery.
Beyond the Basics: Expanding Your Repertoire
You’ve got the basics down – casting, rigging, understanding fish behavior, and landing your catch. That's a huge accomplishment! But the world of fishing is vast and endlessly fascinating. There’s always something new to learn, a different species to target, or a new technique to master. Let’s talk about how you can continue to grow your skills and broaden your fishing horizons.
Exploring Different Species and Their Techniques
Georgia is incredibly blessed with a diverse range of freshwater and saltwater fish. Once you feel comfortable with general techniques, you might find yourself drawn to specific species, each with its own unique challenges and rewards.
Largemouth Bass: The undisputed king of freshwater sportfishing in Georgia. Bass fishing often involves a more active approach, using a wide array of artificial lures to mimic their prey. You'll learn about different lure types like crankbaits, spinnerbaits, jigs, and soft plastics, and how to "work" them to entice a strike. Bass fishing can be exhilarating, with aggressive bites and powerful fights. Our comprehensive Largemouth Bass Fishing in Georgia: The Complete Species Guide is an excellent resource once you're ready to dive deeper into targeting these popular game fish.
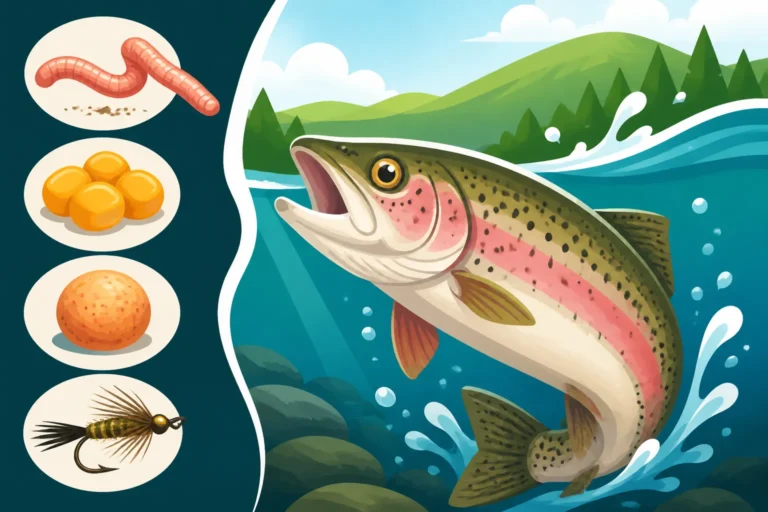
Trout: For those who love the peace and beauty of North Georgia's mountain streams, trout fishing offers a completely different experience. You can pursue rainbow, brown, and even the native brook trout. This often involves lighter tackle, stealthy approaches, and understanding stream currents. Techniques range from bait fishing with corn or PowerBait to spin fishing with small inline spinners, and eventually, the elegant art of fly fishing. The Georgia Trout Fishing: Rainbow, Brown, and Brook Trout Explained guide will illuminate the nuances of chasing these cold-water beauties.
Crappie: Often called "slab crappie" for their delicious fillets, these panfish are a favorite among many Georgia anglers. They are typically found schooling around submerged structure like brush piles, standing timber, or dock pilings. Techniques often involve vertical jigging with small jigs or live minnows, sometimes even using multiple poles (spider rigging). Crappie fishing is fantastic for sheer numbers and can be incredibly rewarding. Our Crappie Fishing in Georgia: Black and White Crappie Guide delves into the best ways to find and catch these tasty fish.
As you explore different species, you’ll naturally pick up new techniques, learn more about fish habitats, and expand your tackle box with specialized gear. Each new species you pursue adds another layer to your fishing expertise.
Essential Knots for Anglers
Knots are the lifelines of fishing. A poorly tied knot is the weakest link in your entire setup, and it's almost guaranteed to fail at the worst possible moment – when you've hooked a big fish! While there are dozens of fishing knots, mastering just a few essential ones will cover most of your needs as a beginner.
Here are two crucial knots you should learn:
- The Improved Clinch Knot: This is an excellent all-around knot for tying your hook, swivel, or lure directly to your fishing line. It’s relatively easy to tie, strong, and reliable. Many beginners learn this one first, and for good reason. It forms a secure connection that holds up well under pressure.
- The Palomar Knot: Another incredibly strong and popular knot, especially favored for tying braided lines to hooks or swivels, though it works great with monofilament and fluorocarbon too. It forms a double loop that distributes stress evenly, making it exceptionally reliable. The Palomar can be a bit trickier to learn initially but is well worth the effort for its strength and versatility.
Practice these knots at home until you can tie them quickly and correctly without looking. A great tip is to use a thick piece of string and a larger hook to practice, then transition to your actual fishing line. There are countless videos and diagrams available online (a quick search on YouTube or Amazon for "fishing knot tying tool" can even show you some gadgets to help), so you can watch them step-by-step until you get it right. Trust me, the confidence of a perfectly tied knot is invaluable when you're fighting a fish.
From Bank to Boat: Expanding Your Fishing Access
Many anglers start their journey fishing from the bank of a pond, lake, or river. Bank fishing is fantastic because it's accessible, affordable, and requires minimal gear. Our guide on Bank Fishing Techniques offers some great tips for maximizing your success from shore. However, as you gain experience, you might start dreaming of reaching those inaccessible spots out in the middle of the lake or drifting down a scenic river.
Kayaks and Canoes: For many, the next natural step is to explore fishing from a kayak or canoe. These small, paddle-powered vessels offer incredible versatility, allowing you to access shallow coves, quiet creek arms, and areas often unreachable by larger boats. Kayak fishing has exploded in popularity in Georgia, and for good reason. They're relatively inexpensive to acquire and maintain, and they provide a unique, close-to-the-water fishing experience. You can start with a basic recreational kayak and gradually outfit it with fishing-specific accessories. Our Kayak Fishing Gear Guide for Beginners is a treasure trove of information for anyone considering this exciting transition.
Small Fishing Boats: If you're looking for more comfort, speed, or the ability to carry more gear and passengers, a small jon boat, aluminum bass boat, or even a pontoon boat might be on your horizon. These offer the ability to cover vast stretches of water, target offshore structure, and troll for species like striped bass. Getting into boating involves a bit more responsibility, including understanding Georgia's boating regulations, safety equipment requirements, and perhaps even obtaining a boater education card, but the added access can be a game-changer for your fishing adventures.
Remember, fishing is a journey, not a destination. There's always more to discover, more to learn, and more beautiful waters to explore in Georgia. Enjoy the process, be patient with yourself, and most importantly, have fun out there!
Basic Gear Comparison: Spinning vs. Baitcasting
| Feature | Spinning Reel Setup | Baitcasting Reel Setup | Best For Beginners (Georgia) |
|---|---|---|---|
| Ease of Use | Very easy to learn, fewer backlashes | Steep learning curve, frequent backlashes for new users | Spinning: Highly recommended for beginners |
| Casting | Excellent for light lures, longer casts | Excellent for heavier lures, more accurate short casts | Spinning: More forgiving for various lure weights |
| Line Type | Versatile: Mono, fluoro, braid | Best with heavier mono, fluoro, or braid | Spinning: Handles lighter lines well for smaller fish |
| Line Twist | Can experience line twist if not managed | Less prone to line twist | Spinning: Easier to manage line twist for beginners |
| Cost | Entry-level combos are very affordable | Can be more expensive, especially quality models | Spinning: More budget-friendly to get started with |
| Target Fish | Panfish, Trout, Small to Medium Bass, Walleye | Larger Bass, Pike, Muskie, Catfish, Saltwater Species | Spinning: Ideal for Georgia's diverse panfish and bass |
Disclaimer
The information provided in this guide is for general informational and educational purposes only. While we strive to offer accurate and up-to-date advice, fishing regulations, conditions, and best practices can change. Always consult the official Georgia Department of Natural Resources (DNR) website or their current fishing regulations handbook for the most accurate and legally binding information regarding licenses, limits, and other rules before heading out to fish. Fishing involves inherent risks; always prioritize safety and wear appropriate personal flotation devices when on or near water.